MS Word, or simply Word, was released back in 1989, and this event can only be compared insignificance with the launch of the first space satellite. A convenient text editor freed millions of people from the slavery of the ballpoint pen. We no longer need to teach handwriting or rewrite entire pages due to one small mistake.
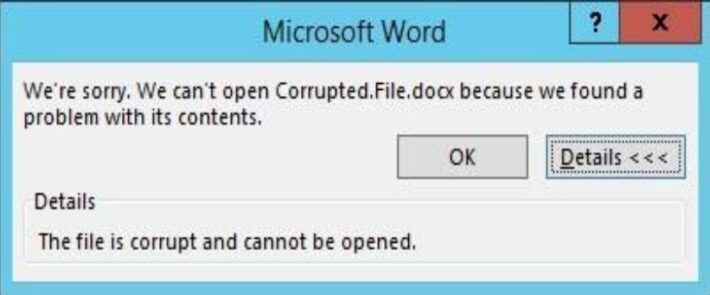
There is only one problem related to MS Word. Sometimes .doc and .docx format documents get corrupted during work, after which they cannot be opened. Just imagine how you put the last point in the text that you worked on for several weeks, and suddenly this message pops up:
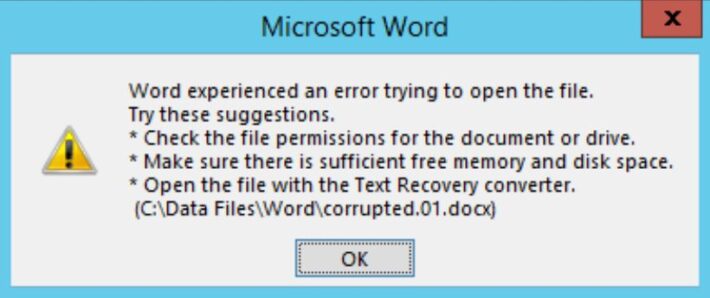
Or this one:
They say that documents do not burn, but what about in this situation? Delete the file, and then start all over again? Not in any case! There is a simple and inexpensive program that can resurrect even severely damaged documents.
This program is well-known among specialists. It is called Recovery Toolbox for Word, but before downloading and installing the application, it makes sense first to try solving the problem using regular Word tools. Perhaps for someone, this will be a pleasant surprise.
Why Won’t the File Open?
Do not blame yourself for the file being corrupted. In most cases, this is not due to user errors, but for technical reasons—power failure, physical damage to the storage medium, bad sectors on the hard disk, and the like. There are dozens of reasons for this.
If the situation occurs again, you need to diagnose the problem immediately. If this is the first time you had the issue, then you could begin to use standard preventive measures:
• Set Autosave in Word
• Copy documents to removable media
• Switch from an obsolete editor to the current version (.doc format is less reliable than .docx)
Everything is straightforward, but as previous experience shows, users begin to worry about the safety of their data only after they spend a couple of sleepless nights recovering it.
Testing a Damaged Document
The first thing to do is to check the size of the damaged document by making a right-click on it with your mouse, then “Properties” – “Size.” If the file sizes match—or roughly match the original—congratulations. The patient is more likely alive rather than dead! And if only two or three of the original 500 kilobytes are left, the news is disappointing. It is no longer possible to get back the file.
For reference, this often happens when the document is unsuccessfully transferred to removable media. In the future, just remember to check its performance before removing it from disk.
Regular Word Recovery Tools
Many recovery tools are not up to date, but Microsoft has provided Word with its own tools for recovering damaged documents. Unfortunately, when working with them, success is not always guaranteed; first of all, your probability depends on the degree of damage to the document.
If light damage does not prevent the return of the entire file, then severe damage allows, at best, only the hope for the reappearance of a single text—without figures and graphs. There are several recovery methods. The easiest way is to open the file in draft mode; this is done as follows:
1. Create an empty Word document.
2. Go to the tab, “View.”
3. Click on the button, “Documents Views.”
4. Select the “Draft” button.
5. Go to the File section.
6. Choose “Options” at the bottom.
7. Go to the “Advanced” menu.
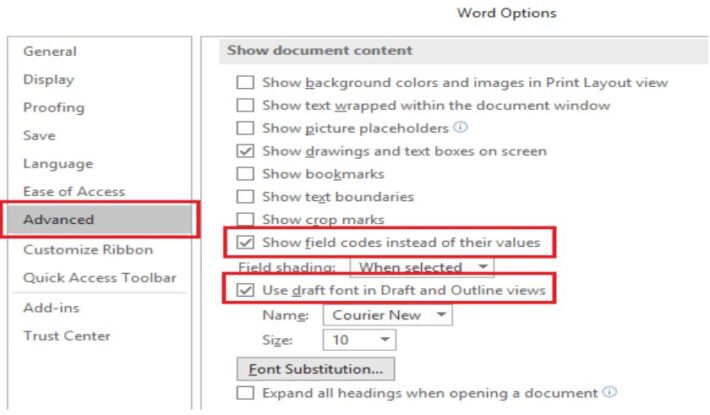
8. In the “Show document content” section, check the option “Use Draft font in Draft and Outline.”
9. In the same section, check the box next to “Show Picture Placeholders.”
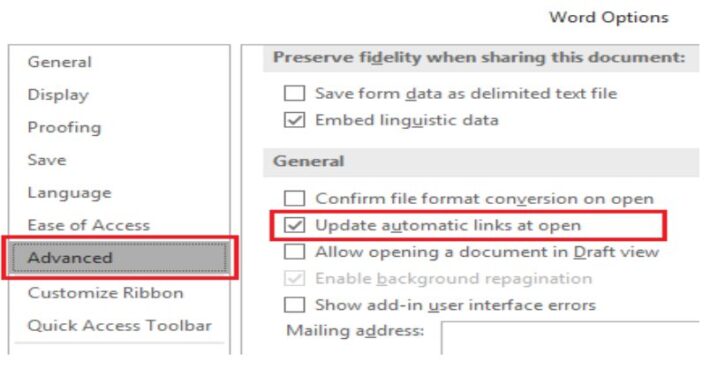
10. Scroll the “General” section to the very end, and uncheck the box next to “Update automatic links at Open.”
11. Now we confirm the changes by clicking OK.
That’s all. Now you can try to reopen the problem file. If it doesn’t work out, then it’s okay. There is another method, where you can try to insert a damaged document into a working file. This is done as follows:
1. Create an empty Word document.
2. Go to the “Insert” menu.
3. Next, go to the Text submenu, the “Insert Object” and “Text from file” commands will appear there.
4. Select the item “Text from file.”
5. Select the damaged document in the pop-up window.
6. Click the “Paste” button.
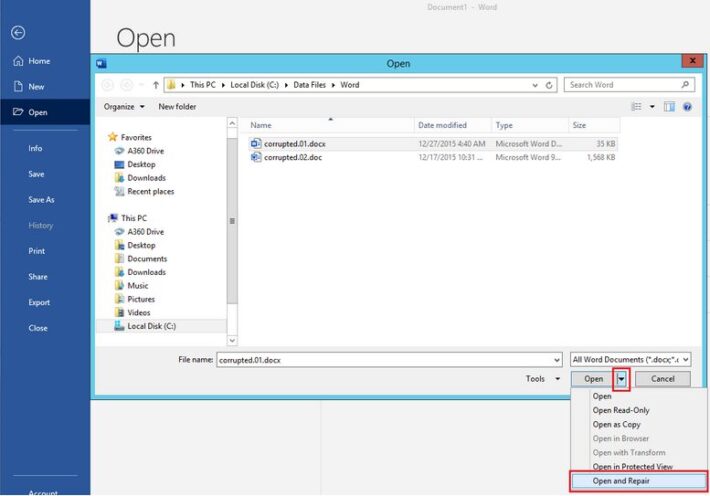
The third method involves using the service built into the office suite. To access it, you again need to create an empty Word document and open it. Go to the “File” menu. In the pop-up window, specify the path to the problem document, then click on the arrow near “Open.” Then select the option “Open and Repair.” Done.
Converter Repair Text from Any File
Users who have the latest versions of the Microsoft Office suite on their computer can use the built-in converter. If this is not possible, then you need to update your version of Office or use other applications—we’ll talk about them a bit later.
To be able to use the standard tool, you need to run Word, then go to “File”– “Open.” In the dialog box, select the required document, and then click on the “File Type” button and select the Recover Text from Any File command from the list.
The built-in service allows you to recover files even with severe damage, but, unfortunately, it does not allow you to save pictures, tables, and other elements. With them, as with text formatting, you have to say goodbye forever.
Last Chance to Return the File
If the regular tools of the Office are not useful, only third-party resources will help to solve the problem. The choice is substantial, and in order not to waste time, it is better to immediately turn for help to the above-mentioned Recovery Toolbox for Word
The developer uses advanced data recovery algorithms that can boast more efficiency than Microsoft built-in tools. There are two ways to recover: an online service and a computer application.
The online service is very convenient. To use it, you just need to download the damaged document on the website, then fill out a special form. The corrected file will arrive in your mail in a few seconds.
If there are several non-working documents, it is much more profitable to purchase a PC application.
Working with the program is no more complicated than with its online counterpart:
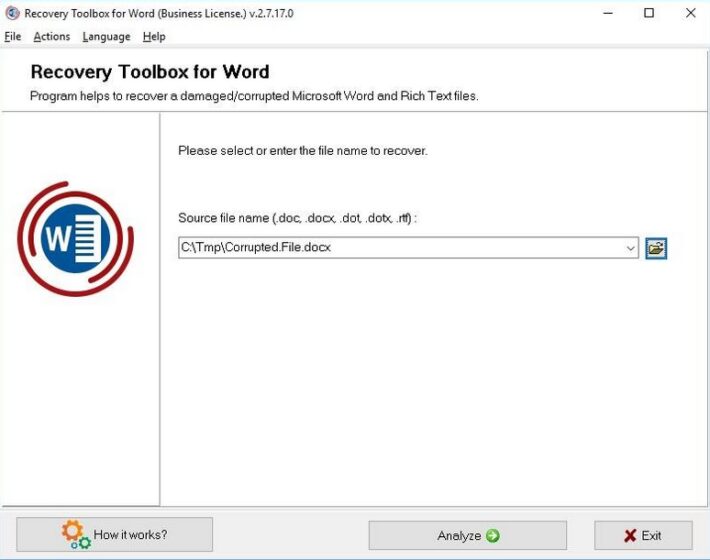
1. Download and run Recovery Toolbox for Word.
2. Specify the path to the damaged file.
3. Click “Analyze.”
4. Select “Start recovery.”
5. Click “Export to MS Word.”
Note! Both resources are paid, but the price is quite affordable. And most importantly, you will have the opportunity to test their work before buying. So, there is no risk.
PS How to Deal with XML Tags
In conclusion, I’ll only touch on the topic of invalid XML tags. This topic will be covered in a different article. What you need to know now is that Word files are complete archives that store information in a compressed form. And they can be unpacked at any time using a standard archiver.
If the error “The name in the end tag must match the type of the element in the start tag” pops up when opening the file, then first you need to unzip this Word document into a separate folder, then find the file with the name “document.xml” in it and open it with Notepad ++. This program is free; finding it will not be difficult for you.
To fix the file, you must manually specify the correct order for closing tags—it is indicated in the error. The first opened tag should be closed last, the second—penultimate, and the like.
Conclusion
I hope that thanks to this article, you were able to solve your problem successfully. If you remember to backup, you could have less stress in the future because you can’t restore the documents using the software method.

